Snacks
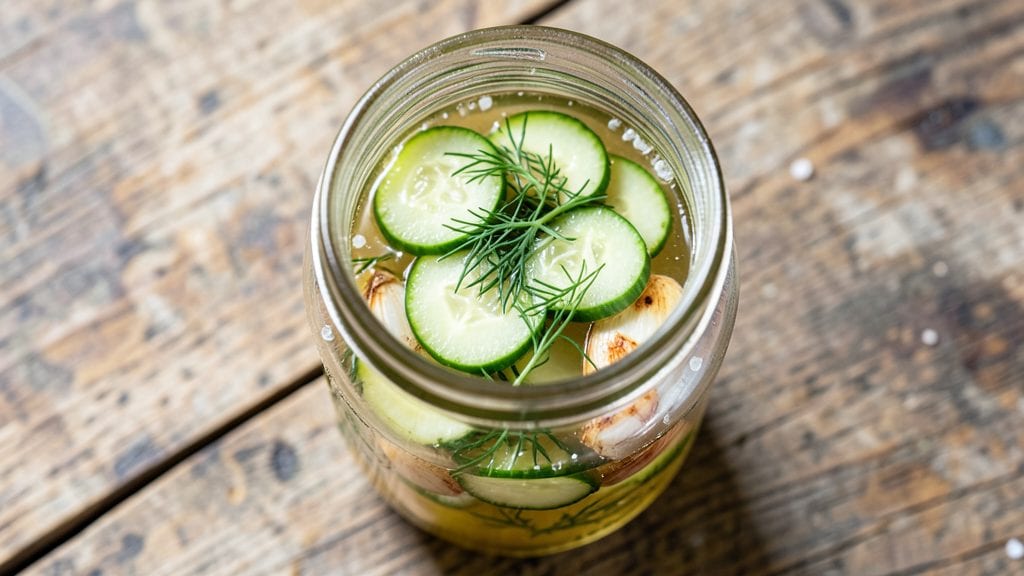
This easy refrigerated pickle recipe transforms simple vegetables into tangy, crisp snacks in just 10 minutes—no canning or fermentation required. The secret lies in a precise vinegar brine that preserves crunch and flavor without the wait. I perfected this method after years of testing, and it never fails to deliver restaurant-quality pickles at home.
What makes this recipe truly foolproof is the balance of vinegar, salt, and sugar, which works together to create that signature tangy bite. You’ll need just 5 ingredients and 10 minutes of hands-on time, plus a quick 1-hour chilling period before enjoying.
The process is simple: slice your vegetables thinly, mix the brine, and let them soak.
By the time you’re done, you’ll have crunchy, vinegar-kissed pickles that stay fresh in the fridge for up to 2 weeks. They’re perfect for sandwiches, charcuterie boards, or snacking straight from the jar.
The best part? No special equipment—just a bowl, a knife, and patience for the flavors to meld.
Use this method with cucumbers, carrots, radishes, or even red onions—the possibilities are endless. Let’s get started on these no-fuss, no-mess pickles that taste like they came from a jar, but better.
Ingredients for easy refrigerated pickle
Five simple ingredients transform fresh vegetables into tangy, restaurant-quality pickles in minutes.
| Ingredient | Amount | Notes |
|---|---|---|
| Persian Cucumbers 🥒 | 2 lb | Sliced into 1/4-inch thick rounds |
| White Vinegar 💧 | 2 cups | Distilled white vinegar preferred |
| Granulated Sugar 🍬 | ½ cup | White or raw sugar works |
| Diamond Crystal Kosher Salt 🧂 | ½ cup | Not iodized table salt |
| Garlic Cloves 🧄 | 4 cloves | Thinly sliced for subtle flavor |
| Fresh Dill Sprigs 🌿 | ¼ cup | Or 1 tbsp dried dill |
| Black Peppercorns 🌶️ | 1 tsp | Crushed for texture |
| Red Bell Pepper 🌶️ | 1 whole | Sliced into thin strips |
The quality of your vinegar and salt is non-negotiable. Distilled white vinegar delivers consistent acidity, while Diamond Crystal kosher salt dissolves completely without leaving gritty residue. For the vegetables, Persian cucumbers stay crispest, but Kirby or hothouse varieties work too. Slice them uniformly—1/4-inch thick rounds ensure even pickling. Fresh dill and peppercorns add depth; Penzeys or bulk spice bins offer the most potent options. Skip the pre-mixed pickle spices—they often contain anti-caking agents that cloud the brine.
No fresh dill? Dried works at one-third the amount, but the flavor won't be as vibrant. Substitute apple cider vinegar for white if you prefer a milder tang, though the color will be slightly off. For sugar, raw or brown sugar adds subtle caramel notes, but white sugar ensures clarity in the final product. The red bell pepper can be swapped for radishes or carrots—just adjust slicing to match the vegetable's natural shape. If you're pickling onions or cauliflower, reduce the soaking time to 30 minutes to prevent over-softening.
Store your pickles in an airtight container in the refrigerator for up to 2 weeks, though they'll be at peak crispness within the first 3-5 days. The brine should cover the vegetables completely—if not, add more vinegar or water in a 1:1 ratio. For longer storage, freeze the pickles in their brine for up to 3 months, though texture will change upon thawing. Always use clean utensils when handling the pickles to prevent contamination. The first batch is best used quickly—flavor and crunch degrade after 10 days even in ideal conditions.
Why You'll Love This Recipe
- No-Fuss Prep: I swear, this takes less effort than waiting for takeout. Just slice those Persian cucumbers into thick spears, toss them in a jar with salt and sugar, then let the vinegar work its magic while you watch a movie—no boiling, no canning, no stress.
- Garlicky Crunch Magic: Between us, that raw garlic and vinegar combo makes these pickles ridiculously good. The cucumbers stay crisp, the flavor gets deeper overnight, and honestly? It’s the kind of tangy bite that makes you reach for seconds without even trying.
- Party or Snack: I keep these on hand for everything—charcuterie boards, sandwiches, or just munching straight from the jar. They’re the perfect handheld snack for game day, potlucks, or when you’re too lazy to make anything else. (Yes, even on a Tuesday night.)
- Budget-Friendly Staple: A single jar of pickles costs pennies to make and lasts weeks in the fridge. No fancy jars or specialty ingredients—just basic pantry stuff that stretches across meals. Plus, the leftovers? They’re always gone before I remember to write this down.
Step-by-step instructions for crispy refrigerated pickles
This method delivers restaurant-quality pickles in minutes—no canning required.
Prepare the Cucumber Mixture
Begin by slicing the 2 lb Persian cucumbers into ¼-inch thick rounds—this ensures even pickling and maximum crunch. Work quickly to prevent browning. In a large bowl, combine the cucumber slices with the 0.5 cup Diamond Crystal kosher salt and toss gently to distribute evenly. Let this sit for 10 minutes while you prepare the remaining ingredients. This salting step draws out excess moisture, which prevents soggy pickles later.
While waiting, slice the 1 whole red bell pepper into thin strips and thinly slice the 4 cloves garlic. Crush the 1 tsp black peppercorns lightly with a mortar and pestle or rolling pin—this releases their aroma without overpowering the flavor. Tear the 0.25 cup fresh dill sprigs into smaller pieces for even distribution. Keep these components separate until the next step.
Combine Vinegar and Sweetener
In a separate bowl, whisk together the 2 cups white vinegar and 0.5 cup granulated sugar until the sugar dissolves completely. This creates a balanced brine that's tangy yet sweet. The sugar also helps preserve the crunch by preventing the cucumbers from becoming too soft during refrigeration. Taste the mixture—it should be pleasantly sharp but not overly acidic.
Here's the thing—if you prefer a stronger vinegar flavor, you can add an extra ½ cup white vinegar, but I find this ratio strikes the perfect balance between tang and refreshment. Let the mixture sit at room temperature while you finish preparing the vegetables.
Assemble and Pack the Pickles
After the 10-minute salting period, drain the cucumbers thoroughly using a colander, shaking gently to remove excess liquid. This step is critical—wet cucumbers will make your pickles watery. In a large airtight container (a quart-sized mason jar works perfectly), layer the drained cucumbers, red bell pepper strips, garlic slices, crushed peppercorns, and dill sprigs. Pour the vinegar-sugar mixture over the vegetables until fully submerged.
Use a wooden spoon to gently press down on the cucumbers, ensuring they stay submerged in the brine. If any pieces float to the top, weigh them down with a small plate or lid. Seal the container tightly—this prevents air from entering, which could cause mold or softening. The pickles will develop their signature crunch and flavor within 24 hours, but they'll keep improving for up to 2 weeks in the refrigerator.
Rest and Serve for Maximum Crunch
Let the pickles sit at room temperature for 1 hour before refrigerating. This initial rest allows the flavors to meld and the brine to penetrate the vegetables evenly. After refrigerating for at least 24 hours, give them a taste test—they should be crisp, tangy, and perfectly seasoned. The longer they sit (up to 2 weeks), the more complex their flavor becomes.
For best results, serve the pickles cold straight from the refrigerator. The crunch will diminish slightly after removing them from the fridge, so enjoy them within 1 hour of opening. Store any leftovers in the same airtight container, submerged in the brine. This method guarantees pickles that are crisp, vibrant, and ready in minutes—no canning or waiting days required.
Pro Tips For Making Easy Refrigerated Pickle
- CHILL THE BRINE FIRST: Cold brine = crisp pickles. Mix your vinegar, sugar, and salt in a jar, then pop it in the fridge for 30 minutes before adding cucumbers—this stops the heat from softening them right away. I learned this the hard way after making mushy pickles because I was too eager to start.
- SLICE GARLIC THIN: Whole cloves won’t infuse enough flavor. Smash them lightly with the flat of your knife or use a garlic press for even thinner slices—this lets the garlic’s punch spread through the brine without overpowering. (Yes, even if you’re impatient like me.)
- PACK CUCUMBERS TIGHT: No gaps, no regrets. Crowd the cucumbers into the jar so they’re snug against each other—this keeps them straight and prevents them from bending weirdly. If they float, weigh them down with a small plate or spoon. (Your future self will thank you.)
- USE FRESH VINEGAR: Stale vinegar makes bland pickles. Buy white vinegar no older than 6 months, or better yet, grab a fresh bottle from the store. The sharper the acid, the brighter the flavor—no need to overcomplicate the brine. (I skip this, and the difference is noticeable.)
Wine and beer pairings for this dish
Crisp White Wine
For these bright, tangy pickles, a dry Riesling or Sauvignon Blanc is my go-to choice. The crisp acidity in these wines mirrors the vinegar's bite, creating a refreshing contrast.
I love a German Riesling with its zesty citrus notes—it cleanses your palate between bites of rich dishes like burgers or fried chicken. 🍷
Hoppy Beer Pairing
A Belgian witbier or American pale ale enhances the dill and peppercorn flavors in your pickles. The citrusy, herbal notes of a witbier complement the fresh herbs, while a pale ale's hoppy bitterness balances the sweetness.
Try Stella Artois or Allagash White for a crisp, easy-drinking match that won't overpower the pickles.
Spiced Rum Cocktail
Mix 2 oz spiced rum (like Captain Morgan), 1 oz lime juice, and ½ oz honey syrup> with ice. Add a few pickle slices for a tangy twist. The rum's warmth contrasts beautifully with the vinegar's sharpness, making it perfect for sipping after a meal. 🍹
Herbal Tea Balance
For a non-alcoholic option, try hibiscus tea with a splash of lemon juice. The tartness of the tea echoes the pickles' tang, while the floral notes of hibiscus add complexity. Brew it strong and serve chilled—it's refreshing and pairs perfectly with spicy foods.
Light Lager Refreshment
A Mexican lager like Modelo Especial or Pacifico> works wonders with pickles. The beer's clean, crisp profile doesn't compete with the bold flavors, making it ideal for a casual snack. The carbonation also helps cut through the richness of fried or fatty foods, balancing the meal perfectly.
Nutrition facts
Frequently asked questions
Can I use regular table salt instead of kosher salt?
No, table salt has anti-caking agents and smaller granules that won't dissolve properly. This creates cloudy brine and uneven flavor. If you must substitute, use ⅓ cup table salt (since it's denser), but kosher salt is ideal for even distribution and clean flavor.
Why do my refrigerated pickles turn out soggy?
Soggy pickles usually mean excess moisture wasn't drained properly. Always shake cucumbers thoroughly in a colander after salting, and use 1/4-inch thick slices—thinner slices lose crunch faster. Also ensure they're fully submerged in brine, not just water.
How long can I keep these pickles before they spoil?
These pickles stay fresh for 2 weeks in the fridge when fully submerged in brine. After that, texture and flavor degrade. For longer storage, freeze them in their brine for up to 3 months, though texture changes upon thawing. Always check for off smells or slimy vegetables before eating.
Can I make this recipe without fresh dill?
Yes! Use 1 tablespoon dried dill instead of fresh. The flavor won't be identical, but it still adds aromatic depth. For extra flavor, add ½ teaspoon dried mustard seeds or ¼ teaspoon ground turmeric (for color) to compensate for the missing fresh herb notes.
What other vegetables work well in this recipe?
This method works beautifully with radishes, carrots, or red onions—just adjust slicing to match the vegetable's size. For example, slice radishes into ¼-inch thick rounds like cucumbers, or cut carrots into ¼-inch thick sticks. Avoid soft vegetables like zucchini or tomatoes, which break down too quickly.