Desserts
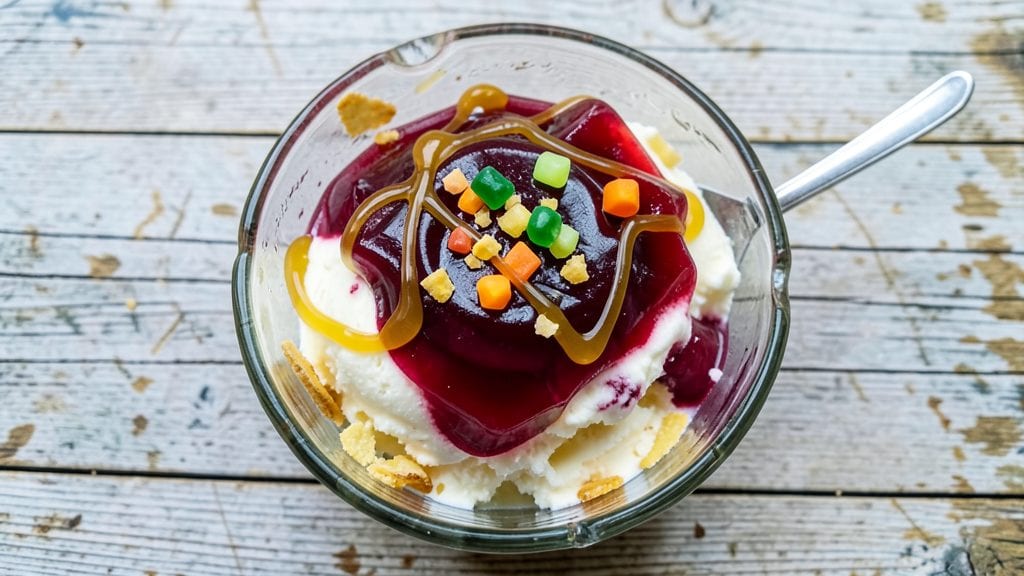
This Depression Era Jello ice cream recipe proves that resourcefulness and creativity can turn simple ingredients into nostalgic magic. During the Great Depression, families stretched every penny, and this two-ingredient dessert became a beloved staple—transforming basic Jell-O and ice cream into something extraordinary.
The contrast of creamy, cold ice cream and wobbly, fruity gelatin creates a texture that’s both playful and satisfying.
The beauty of this recipe lies in its simplicity: just two ingredients, minimal effort, and maximum nostalgia. No fancy equipment or complicated techniques are needed—just a bowl, a spoon, and a little patience.
The gelatin sets beautifully in the freezer, creating layers of fruity flavor that cut through the richness of the ice cream. It’s the kind of dessert that feels indulgent yet reminds us of a time when ingenuity was key.
What you’ll end up with is a dessert that’s as much about memory as it is about taste—bright, tangy, and just sweet enough to feel like a treat. The gelatin’s firm yet jiggly texture contrasts perfectly with the smoothness of the ice cream, making every bite a little adventure.
This recipe isn’t just about recreating history; it’s about bringing a piece of the past into your present.
Perfect for summer picnics, potlucks, or a quick dessert when you’re craving something sweet but don’t want to fuss. The best part? You can make it ahead and store it in the freezer for up to a week.
Let’s bring a taste of the Depression Era back to life—one spoonful at a time.
Ingredients for depression era jello ice cream
Two ingredients, endless nostalgia—this Depression Era classic turns simple pantry staples into magic.
| Ingredient | Amount | Notes |
|---|---|---|
| Unflavored Gelatin 🍬 | 1 package | Small box, 3 oz total weight |
| Vanilla Ice Cream 🍦 | 2 cups | Store-bought or homemade, fully frozen |
| Fruit Flavor Jell-O Powder 🍓 | 1 package | Any fruit flavor, 3 oz box |
| Cold Water 💧 | 1 cup | Chilled for proper gelatin setting |
| Granulated Sugar 🍚 | 1 tbsp | Optional, for extra sweetness |
| Small Plastic Wraps 📦 | 4 pieces | For individual serving portions |
| Heavy Whipping Cream 🥛 | ¼ cup | Optional, for richer texture |
| Vanilla Extract 🍯 | ½ tsp | For enhanced flavor |
The gelatin is the heart of this recipe, so don't skimp on quality. Knox brand is the classic choice, but any unflavored gelatin will work. The ice cream should be fully frozen—hard enough to hold its shape when scooped. For the Jell-O powder, Kraft or generic store brands are perfectly fine. The fruit flavor can be anything from cherry to lemon-lime, but strawberry or grape are the most nostalgic choices. If you're using homemade ice cream, make sure it's fully hardened before mixing.
No gelatin? Agar-agar powder can be substituted at double the amount, but the texture will be firmer. Want a richer texture? Add the heavy whipping cream to the gelatin mixture before freezing. For extra flavor, mix in the vanilla extract with the ice cream before freezing. The sugar is truly optional—some Depression Era recipes skipped it entirely—but it rounds out the flavor if your Jell-O is tart. If you're making this ahead, prep the gelatin mixture first so it's ready to layer when the ice cream is frozen.
This dessert keeps beautifully in the freezer for up to 2 weeks, making it perfect for meal prep. To serve, simply peel back the plastic wrap and scoop. The texture is best when served slightly thawed at the edges—let it sit at room temperature for 5-10 minutes before eating. For a fun twist, layer different fruit flavors in each serving. The contrast of the cold, creamy ice cream and the jiggly gelatin is what makes this recipe truly special.
Why You'll Love This Recipe
- No-Fuss Magic: I swear, this takes less time than waiting for takeout. Just bloom that gelatin in cold water while you scoop ice cream—no fancy tools, no stress.
- Layered Bliss: That first spoonful? Creamy ice cream cut through by fruity, wobbly Jell-O—like a nostalgic party in your mouth. (Honestly, it’s the kind of dessert that makes you pause mid-sentence.)
- Budget Party Trick: A single box of Jell-O stretches into hours of dessert for almost nothing. My college friends called it "poor man’s fancy," but they’d sneak seconds anyway.
- Freezer-Friendly Forever: Make a batch on Sunday, freeze it, and pull out portions anytime. No one will guess it’s just pantry staples—your secret’s safe, and your fridge’s always stocked.
Step-by-step instructions for Depression Era Jello ice cream
This classic recipe transforms simple pantry staples into a creamy, nostalgic dessert with minimal effort.
Bloom the Gelatin and Prepare the Base
Begin by sprinkling the entire 1 package unflavored gelatin over the 1 cup cold water in a medium bowl. Let it sit for 5 minutes—this is called "blooming," and it ensures the gelatin activates fully. You'll see the granules absorb the water and soften, but they won't dissolve completely yet. This step is critical because blooming prevents clumping in your final mixture.
In a separate large bowl, combine the 2 cups vanilla ice cream with the 1 package fruit flavor Jell-O powder and the 1 tbsp granulated sugar. Use a rubber spatula to fold everything together until the Jell-O powder is fully incorporated and the mixture looks smooth. If using the 0.25 cup heavy whipping cream, fold it in now along with the 0.5 tsp vanilla extract for extra richness. The ice cream should be fully frozen, so work quickly to keep the texture manageable.
Combine and Heat the Mixture
Carefully pour the bloomed gelatin mixture into the ice cream-Jell-O blend. Use the spatula to fold everything together until fully combined—this prevents any dry spots from forming. Place the bowl over a pot of simmering water (double boiler method) and heat the mixture, stirring constantly with the spatula, for 5-7 minutes. The goal is to reach a temperature of 160°F, at which point the mixture should look smooth and slightly thickened.
Here's the thing—don't let the mixture boil. You're looking for gentle heat that melts the ice cream and gelatin without scrambling the proteins. Once it reaches 160°F, remove the bowl from the heat and let it cool slightly for 2-3 minutes. This ensures the texture remains silky rather than grainy. The mixture should be warm but not hot to the touch.
Pour and Freeze the Ice Cream
Divide the warm mixture evenly among 4 small plastic wraps, spreading each portion into a thin, even layer. The thinner the layer, the faster it will freeze and the creamier the texture will be. Press another piece of plastic wrap directly onto the surface of each portion to create a sealed packet. This prevents ice crystals from forming on the surface, which is key to that authentic Depression-era texture.
Place the wrapped portions on a baking sheet and freeze for 4-6 hours, or until completely solid. You'll know it's ready when the edges feel firm and the center has a slight give—like a firm custard. For best results, freeze overnight. The longer it freezes, the more defined the layers will be when you slice it later.
Serve with Style
To serve, remove one packet from the freezer and let it sit at room temperature for 5-10 minutes until it softens slightly. This makes it easier to slice without tearing. Using a sharp knife, cut the packet open and slide the ice cream onto a plate. The layers should separate cleanly, revealing the creamy vanilla ice cream base and the fruity Jell-O swirls.
For a true Depression-era touch, serve in small glass bowls or vintage-style dishes. The contrast between the smooth ice cream and the wobbly Jell-O layers is what makes this dessert so nostalgic. Enjoy immediately while the textures are at their peak—this isn't a dessert that improves with sitting out, so dig in right away.
Pro Tips For Making Depression Era Jello Ice Cream
- Bloom the Gelatin Properly: DESCRIPTION: Dump the unflavored gelatin into cold water and let it sit for at least 10 minutes—no stirring, just soaking. I used to rush this and end up with grainy ice cream that tasted like rubber. Trust me, the wait makes the texture smooth as silk.
- Chill the Ice Cream First: DESCRIPTION: Take the vanilla ice cream out of the freezer and let it soften just enough to scoop, but still hold shape. Mixing it with stiff ice cream means lumps of frozen cream that never dissolve, leaving you with a sad, icy mess. Aim for "spoonable but not soupy."
- Skip the Boiling Water: DESCRIPTION: The Jell-O powder only needs warm water—about 160°F (70°C)—not a rolling boil. Boiling it turns the gelatin into glue, and your dessert will end up like a chewy, flavorless brick. A thermometer helps, but even a quick taste test works: if it’s too hot to touch for 3 seconds, it’s too hot.
- Fold, Don’t Stir: DESCRIPTION: Once you mix the gelatin and Jell-O solution, gently fold it into the softened ice cream with a spatula—no whisking. Stirring too hard incorporates air, which makes the texture icy instead of creamy. Think "marble" not "whip," and you’ll nail it.
Pro cooking tips for depression era jello ice cream
Gelatin Bloom Mastery
The 5-minute bloom is non-negotiable for smooth texture. Sprinkle the Knox brand gelatin evenly over the cold water—never pour it directly, or you’ll end up with clumps. Use a whisk to gently break up any surface lumps after blooming, but don’t stir vigorously.
I’ve learned the hard way that over-stirring at this stage creates a grainy final product. Keep the bowl in the fridge while you prep the ice cream mixture to maintain cold temperatures. 💧
Temperature Control Secrets
Heating to 160°F is critical—any hotter, and the gelatin will break down. Use a thermometer (I recommend the Thermoworks Thermapen) to monitor the temperature precisely. If your mixture starts to bubble, immediately remove it from heat and let it cool for 2-3 minutes before proceeding.
The goal is a silky, slightly thickened consistency, not a boiling pot of scrambled gelatin. 🌡️
Plastic Wrap Technique
Pressing the second layer of plastic wrap directly onto the gelatin mixture creates an airtight seal that prevents ice crystals from forming on the surface. Use plastic wrap with a slight sheen (like Glad Press'n Seal) for best results—it sticks better than matte varieties.
For even layers, spread the mixture into a ¼-inch thick sheet using an offset spatula. This thinness ensures rapid freezing and that perfect wobbly texture. ❄️
Freezing Time Hacks
For 4-6 hours of freezing, place your wrapped portions on a baking sheet first—this prevents them from sticking together. Once firm, transfer to a freezer-safe container for longer storage. Pro tip: Freeze the mixture in a loaf pan instead of individual wraps if you prefer a single serving.
The center should have a slight give when tested with your finger after 6 hours, but it’s better to freeze overnight for maximum layer definition. ⏰
Serving Like a Pro
Let your serving soften for 5-10 minutes before slicing—this prevents the gelatin from tearing. Use a hot knife (dipped in hot water and wiped dry) for cleaner cuts through the layers.
For a vintage touch, serve in small glass bowls with a dollop of whipped cream or a sprinkle of crushed graham crackers. The contrast of temperatures—cool gelatin against creamy ice cream—is what makes this dessert magical. 🍽️
Troubleshooting Common Issues
If your gelatin turns out too firm, it likely didn’t reach 160°F during heating. For a softer texture, add 1 tsp corn syrup to the gelatin mixture before freezing. If the layers separate unevenly, your mixture may have been too warm before freezing—always cool it slightly after heating.
And if you see ice crystals? That means air got in during freezing. Next time, press the plastic wrap tighter against the surface. 💡
Nutrition facts
Frequently asked questions
Why does this dessert need to be frozen in plastic wrap?
The plastic wrap creates an airtight seal that prevents ice crystals from forming on the surface, which would ruin the authentic wobbly texture. The second layer pressed directly onto the mixture also helps maintain even freezing throughout. Without it, you'll get a grainy, icy consistency instead of that classic Depression-era smoothness.
Can I use store-bought gelatin cups instead of powder?
Just use 4 individual gelatin cups (like the small fruit-flavored ones) instead of the powder. Drain them completely, then blend with 1 cup cold water before blooming. The flavor will be slightly more concentrated, so you might want to reduce the sugar to ½ tablespoon to balance it.
What if my gelatin mixture doesn't set properly?
If your gelatin turns out too soft, it likely didn't reach 160°F during heating. For a firmer texture, try adding ½ teaspoon more gelatin powder next time. If it's too firm, the mixture may have been too hot before freezing—always let it cool slightly after heating to maintain that perfect wobbly consistency.
How can I make this dessert without ice cream?
For a budget-friendly version, replace the ice cream with 2 cups whipped cream or 2 cups frozen yogurt. The texture will be lighter, but the fruity gelatin layers will still shine. If using yogurt, let it thaw slightly before mixing to prevent excessive graininess in the final product.
Why did my layers separate when I sliced it?
This usually happens when the mixture was too warm before freezing or if air got trapped during the process. Next time, press the plastic wrap tighter against the surface and let the mixture cool completely to room temperature before freezing. For extra stability, chill it in the fridge for 10 minutes after heating before pouring into wraps.