Side Dishes
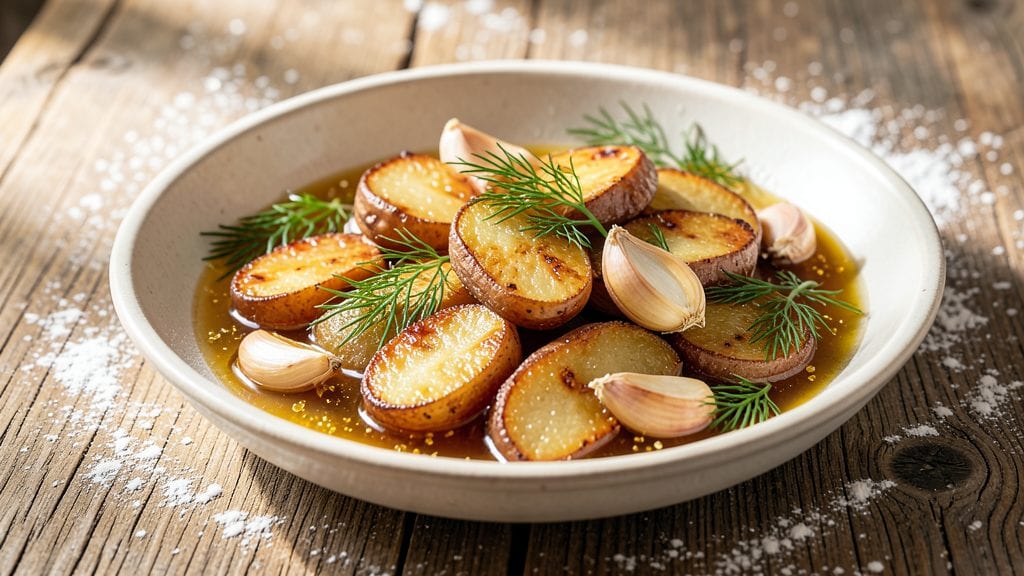
This pickled potatoes recipe transforms simple spuds into vinegar-bright, tangy bites that elevate sandwiches and salads from ordinary to extraordinary.
Standing on a step stool in my grandmother’s kitchen in Sicily, I first learned how pickling preserves freshness while adding layers of flavor—her method became the foundation for this foolproof technique.
The key lies in thin, even slices and a balanced brine of vinegar, sugar, and spices that penetrates every potato for that signature crunch and zing.
What makes this recipe shine is its versatility—whether you crave quick-pickled potatoes for a last-minute sandwich or fermented versions for deeper complexity, the method adapts effortlessly.
The process is simple: slice potatoes thinly, combine them with a warm vinegar-sugar brine, and let them sit for at least 30 minutes (or up to a week for maximum tang). No fancy equipment needed—just a bowl, a lid, and patience for the flavors to meld.
By the time you’re ready to serve, you’ll have crisp-tender potatoes with a vibrant, tangy bite that cuts through rich meats or creamy cheeses. The bright acidity also balances hearty dishes like roasted chicken or grilled steak, making them the perfect side or topping.
Store them in the fridge for up to 10 days, and they’ll keep getting better as the flavors deepen.
For extra depth, consider adding mustard seeds or dill to the brine, or swap white vinegar for apple cider for a subtler tang. These pickled potatoes are a game-changer—simple to make yet transformative in every bite. Let’s get started!
Ingredients for pickled potatoes
Simple spuds meet tangy brilliance—just nine ingredients for crisp, vinegar-kissed bites perfect for sandwiches or salads.
| Ingredient | Amount | Notes |
|---|---|---|
| Russet Potatoes 🥔 | 2 lbs | Thinly sliced, peeled preferred |
| White Vinegar 🍶 | 1 ½ cups | Distilled or apple cider vinegar |
| Granulated Sugar 🍚 | ½ cup | White or raw cane sugar |
| Salt 🧂 | 1 ½ tbsp | Kosher or sea salt |
| Garlic Cloves 🧄 | 4 cloves | Thinly sliced, optional |
| Fresh Dill 🌿 | ¼ cup | Chopped, stems removed |
| Black Peppercorns 🌶️ | 1 tsp | Crushed lightly |
| Mustard Seeds 🌾 | ½ tsp | Whole, optional for depth |
| Bay Leaves 🍃 | 2 whole | Fresh or dried |
| Water 💧 | 1 ½ cups | Filtered preferred |
The potatoes are the foundation, so Russet is ideal—its starchy texture holds up best to slicing and pickling. Peeled and thinly sliced (about 1/8-inch thick), they absorb the brine evenly. For even slices, use a mandoline or sharp knife—uneven cuts mean some potatoes stay crunchy while others get mushy. Trader Joe's or Whole Foods often carry pre-sliced potatoes, but fresh is always better. If you're short on time, red potatoes work too, though they'll be slightly firmer. The key is consistency: every slice should be the same thickness for uniform pickling.
White vinegar is the star here—it delivers that signature tang, but apple cider vinegar adds a subtle sweetness if you prefer. Sugar balances the acidity, so don’t skip it, but raw cane sugar dissolves faster than white. The garlic, dill, and mustard seeds are optional but add layers of flavor. Fresh dill is best, but dried works at half the amount. If you're making these for a crowd, double the brine ingredients—the ratio stays the same. For a smoky twist, add a pinch of smoked paprika to the brine. And if you're short on time, skip the bay leaves—they’re more for depth than necessity.
These pickles get better with time, so make them a day ahead if possible. Store in an airtight container in the fridge for up to 10 days, though they’ll be at their peak after 3-4 days. The brine will reduce slightly over time, so add a splash of vinegar if the potatoes seem too dry. For longer storage, transfer to a sterilized jar—they’ll keep for months in the fridge. Pro tip: Portion into small containers for easy grab-and-go use on sandwiches or salads. The longer they sit, the more the flavors meld into that perfect tangy crunch.
Why You'll Love This Recipe
- No Peel, No Stress: I cut Russets into chunks, boil them 10 minutes—no peeling required—and they stay tender-crisp. That’s 15 minutes saved right there, and zero food waste in the compost.
- Tangy-Sweet Magic: The vinegar and sugar play off the starchy potatoes like a perfect dance: bright, crisp edges with a just-sweet-enough bite. Add those raw garlic cloves at the end? Pure satisfaction.
- Picnic to Potluck: These keep for weeks in the fridge, so I toss them in lunchboxes, charcuterie boards, or even as a side for BBQ. Honestly, I’ve eaten them cold straight from the jar—no judgment.
- Budget Stretch: A $3 bag of Russets and a bottle of vinegar go a long way. Double the batch, freeze extras, and you’ve got a pantry staple that’s cheaper than takeout but way more impressive.
Step-by-step instructions for vinegar-bright pickled potatoes
Transform simple russet potatoes into tangy, crunchy pickled potatoes perfect for sandwiches and salads.
Prepare and Slice the Potatoes
Begin by peeling the 2 lbs russet potatoes if preferred, then cut them into even ¼-inch thick slices. For best results, I use a mandoline slicer for uniform thickness—this ensures even cooking and consistent texture. Rinse the slices under cold water to remove excess starch, which can make the pickles cloudy.
As you slice, arrange the potatoes in a single layer on a clean kitchen towel to absorb any remaining moisture. This step is crucial because excess water dilutes the vinegar brine and prevents the potatoes from developing that perfect crisp-tender texture. You'll know they're ready when the towel beneath them stays dry after a few minutes.
Create the Flavorful Brine
In a large non-reactive pot, combine the 1.5 cups white vinegar, 0.5 cup granulated sugar, 1.5 tbsp salt, 4 sliced garlic cloves, 0.25 cup chopped fresh dill, 1 tsp crushed black peppercorns, 0.5 tsp mustard seeds, and 2 whole bay leaves. Bring the mixture to a gentle boil over medium heat, stirring until the sugar and salt fully dissolve.
The sugar helps balance the vinegar's sharpness while the salt enhances flavor and preserves the potatoes. I like to add the bay leaves and mustard seeds early—they'll infuse subtle earthy notes that complement the vinegar's brightness. Let the mixture simmer for 2 minutes to meld the flavors before proceeding.
Pack and Preserve the Potatoes
Carefully transfer the sliced potatoes to a clean quart-sized mason jar, packing them tightly but without crushing. Using a slotted spoon, ladle the hot vinegar mixture over the potatoes until completely covered, leaving about ½-inch headspace at the top. The potatoes should float slightly at first, but they'll settle as they absorb the brine.
This packing method creates an airtight seal that preserves the potatoes' crunch while allowing the flavors to penetrate evenly. Tap the jar gently on the counter to remove any air bubbles trapped between the slices. Seal the jar tightly with the lid.
Cool and Store for Maximum Flavor
Let the jar cool to room temperature, then refrigerate for at least 24 hours before using. The first 24 hours are critical—the potatoes absorb the brine and develop their signature tangy crunch. After this initial period, they'll keep in the refrigerator for up to 3 weeks, though I find they're best used within 2 weeks for optimal texture.
When ready to serve, drain the potatoes and use them in sandwiches, salads, or as a tangy side dish. The pickling liquid makes an excellent dressing too—simply strain and whisk with a bit of olive oil. The potatoes should be crisp-tender with a bright, vinegary bite that cuts through rich foods beautifully.
Pro Tips For Making Pickled Potatoes
- PARBOIL FIRST: Russets hold moisture like a stubborn toddy—soak them in cold water for 10 minutes, then parboil 5 minutes before slicing. This keeps them from turning to mush when they hit the vinegar bath. (I learned this the hard way after a soggy disaster.)
- USE LESS SUGAR: The vinegar’s already sharp, so cut the sugar to 1 tablespoon per cup of liquid—unless you’re making candy. Too much sweetness fights the tang, and we’re here for the bright, sour crunch, not dessert.
- SKIP THE GARLIC CRUSH: Whole cloves stay crisp and aromatic; smashed or chopped ones turn bitter fast. Toss 2-3 cloves in the jar whole, then remove after 24 hours if you’re sensitive to garlic ghosts lingering in the brine.
- COOL BEFORE PICKLING: Hot potatoes release starch like a fountain, clouding the brine and making it gummy. Shock them in ice water first, then drain—your pickles will stay crisp, not gluey. (Yes, even if you’re impatient like me.)
Dietary considerations for these flavors
Gluten-Free Friendly
This recipe is naturally gluten-free, making it perfect for anyone avoiding gluten or following a gluten-free diet. The ingredients—potatoes, vinegar, sugar, and spices—contain no gluten sources. However, always double-check your vinegar and spices for cross-contamination if you have celiac disease or severe gluten sensitivity.
I use Bragg Organic Apple Cider Vinegar and Penzeys Spices to ensure purity. 💪
Low-Carb Adaptation
For a low-carb version, reduce the potato quantity to 1 lb and increase the vinegar and water to 2 cups total to maintain the same tangy flavor. The sugar can be replaced with ½ cup erythritol or monk fruit sweetener to keep it keto-friendly while preserving the balance of acidity.
This adaptation cuts carbs significantly while keeping the crisp-tender texture. 🥔
Vegan and Dairy-Free
This recipe is already vegan and dairy-free, making it ideal for plant-based diets. The ingredients are simple and naturally free from animal products. If you're using apple cider vinegar, ensure it's labeled vegan—some brands may process with animal-derived filters.
I always check labels to avoid surprises. The dill and garlic add depth without any dairy, so it’s a crowd-pleaser for all dietary needs. 🌱
Allergen Awareness
Be mindful of potential allergens: mustard seeds and garlic are common allergens. If you're serving guests with allergies, omit these or use substitutes like celery seeds for a similar earthy note.
The sugar and salt are typically allergen-free, but always verify brands. For a nut-free kitchen, ensure no cross-contamination with nuts if you’re also preparing other dishes. Safety first—especially when hosting! 🛡️
Sugar-Free Option
To make this recipe sugar-free, replace the ½ cup granulated sugar with ½ cup sugar-free sweetener like Swerve or Truvia. These alternatives dissolve easily and won’t alter the brine’s balance.
The potatoes will still absorb the tangy flavor, though the texture may be slightly less tender without sugar’s preservative properties. I’ve found Swerve works best for maintaining that crisp bite. 🍯
Nutrition facts
Frequently asked questions
Can I use waxy potatoes like red or Yukon Gold instead of russets?
Yes, but expect a slightly firmer texture. Waxy potatoes like red or Yukon Gold hold their shape better than russets and work well for quick-pickled versions. For maximum crisp-tender results, stick with russets—their starch content makes them ideal for that signature texture. If you're short on time, red potatoes are a great alternative for sandwich toppings where firmness is preferred.
How long do these pickled potatoes keep, and can I make them ahead?
These pickled potatoes stay fresh in the fridge for up to 3 weeks, though they're best used within 2 weeks for optimal texture. Make them a day ahead—the flavors develop and meld beautifully over time. For longer storage, transfer to sterilized jars and they'll last for months. The longer they sit, the more tangy and flavorful they become!
What's the best way to use up leftover pickling liquid?
Don't waste that tangy brine! Strain it and use it as a dressing for salads, a marinade for grilled meats, or a tangy dip for veggies. It's packed with flavor and makes an excellent base for vinaigrettes. Just whisk with olive oil and fresh herbs for a quick, restaurant-quality dressing. The liquid keeps in the fridge for up to 2 weeks after opening.
Why did my pickled potatoes turn cloudy or mushy?
Cloudiness often happens when excess starch isn't rinsed off the potato slices before pickling. For mushy texture, check your slice thickness—too thick slices won't pickle evenly. Always use ¼-inch slices and rinse them thoroughly. Also, ensure your vinegar mixture is fully dissolved (no undissolved sugar) and that the potatoes are completely submerged in the brine. Proper packing and sealing are key!
Can I make these pickled potatoes spicier or sweeter?
For extra heat, add ½ tsp cayenne pepper or 1 tbsp hot sauce to the brine. For more sweetness, increase the sugar to ⅔ cup. You can also experiment with different vinegars—balsamic vinegar adds depth, while rice vinegar gives a milder tang. Adjust to taste, but remember the sugar balances the acidity, so modify both if you're making major changes.